Elderberry is the hardest wine I have made as it is so close to traditional wine with a clear comparison to grapes. Other fruit wines such as blackberry have a strong flavour of their base fruit that is the basis of their profile. Elderberries make a “purer” wine far more reliant on the balance of acidity, tannin and sweetness that is extracted as you ferment.
CLICK HERE FOR LAST YEARS WINE
I have constantly been refining how I make my elderberry wine and this year I am hoping that I will be closer to mastering it. First I needed the best berries I could get and I have foraged further than previous years and trying to pick only the ripest and tastiest I can find. Elderberries can ripen at different times, vary in taste from tree to tree and even which side of the tree that gets the most sun. I have found that trees on moist but well draining ground provide the sweetest berries with the fullest, fruitiest flavour. Being on a bank of a stream or unhindered by other thirsty trees seems to be best while trees on flat drier ground take longer to ripen. Trees on muddy water logged ground produce the most tannic and bitter elderberries with little sugar or flavour profile so are best avoided. When starting to make wines I never though I would be writing about elderberry “terroir!”
CLICK HERE FOR A GUIDE TO FORAGING ELDERBERRIES
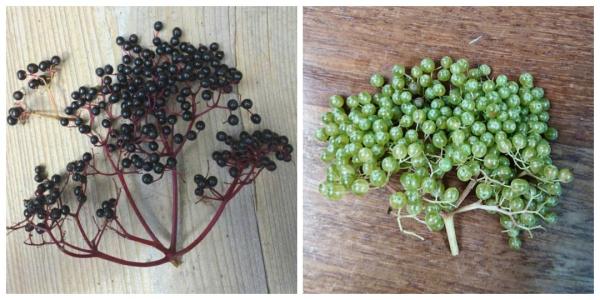
Choosing when to pick has been a test of will but is paying dividends. Virtually all clusters have had a taste test to make sure they are ripe before I pick and that they are from sweeter tasting trees. The best berries have a full fresh berry taste with a detectable sweetness and mouth feel is present as a “buttery” sensation – to me at least. Acidity and tannin is reduced in comparison to the more immature berries that look identical but have still not plumped up full of juice. This year I found two new species of elder tree. White elderberries are sweeter with the tiniest hint of elderflower to them. As they are so rare only five or so clusters could be harvested so they do not make up any detectable percentage of the wine. The other species that gives pink elderflowers provides overly bitter berries that have been left unused. These trees were easily identified as they had dark green leaves that were feathered and curled compared to the lighter oval leaves of the traditional elder tree.
Once home the clusters were rinsed to get dust, leaves and any spiders removed. The few hard, mushy, reddish or otherwise unwanted berries removed and then the good ones gently tickled from the stems. If there are too few for a full batch of wine I froze them ready for when there were enough.
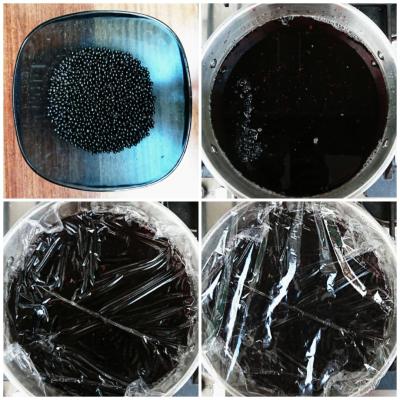
Although I had the best fruit I could fine and my recipe was good my methodology was next to get an over haul. Elderberries are rich in tannin with the skins and seeds being particularly packed full and I wanted to manage how it was extracted. Due to their small size it means there is a lot of skin and seeds in comparison to the juice – certainly more so than grapes and because of this tannin is the enemy when making elderberry wine. A cold soak allows the rich colour and aroma to be extracted from the skins and as it is an aqueous extraction it leaves the tannin seemingly untouched as it is only soluble in ethanol as the wine ferments.
CLICK HERE FOR A GUIDE TO COLD MACERATION

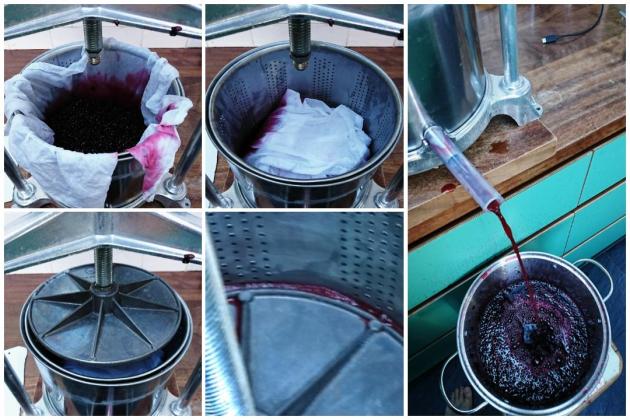
Cold maceration had always been part of my method for elderberry wine so to further manage I intended to test two methods to limit tannin extraction. One is to press the juice totally from the berries after the cold maceration then add only half the skins to the must allowing only half the tannin available to be extracted. I never tested this as I had great results using not weight but time as the limiting factor. The elderberries were pressed two days into fermentation and then discarded. Doing this created a rich dark must that continued to ferment for another five days.
CLICK HERE FOR A ROUGH GUIDE TO TANNIN
Tannin seems to have been held back allowing the whole of the elderberry taste to shine through. The juice was far fruitier with a slight almost blackberry and deeper cherry like taste that I had not been able to maximise previously. This will take at yeast two years to mature, maybe even more but the admittedly crude taste test during fermentation has shown a rounder balanced wine than with. Hopefully I will be lucky like last year when spontaneous malolactic fermentation occurred mellowing acidity. Next year I will be further refining I hope.
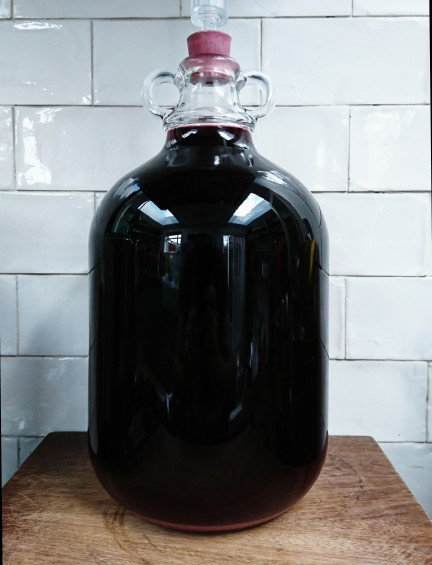
ELDERBERRY WINE 4.5 Litres
Suitable yeasts – R56, Lalvin R2, D80, D254, Bergundy. Strong full bodied wine suitable for higher ABV of 13% Suitable for oaking and can be left totally dry or will a very slight back sweeten. Takes the longest of any fruit wine to mature at a minimum of 2 years. Skins can be used for a second run elderberry rose or an medium bodied elder & blackberry wine.
2kg elderberries
3.5L water
1kg-ish sugar to 1.09SG
Juice of one lemon
1tsp pectolase
1tsp yeast nutrient (optional)
Yeast
- Pick any elderberries and freeze until enough have been sourced.
- Cold soak for three to five days in a sterile covered pan or container in the fridge in two litres of water and a crushed campden tablet to kill any wild yeasts.
- On the penultimate day of cold soak, boil the rest of the water to sterilize and leave to get to room temperature. Mash the berries and combine the next day.
- Add pectic enzyme and leave for 12 to 24 hours.
- Stir in the sugar to 1.09SG, lemon juice then the yeast.
- Ferment for two days in primary then press the juice – a good manual squeeze in cleaned hands is perfectly good (A press does wonders though) The juice can simply return to the primary fermenter and then continue to ferment.
- Filter into demijohn to remove any rogue seeds or skins that may have stayed and ferment in secondary with an airlock.
- Rack after five weeks then two months after that to remove sediment. The wine wants to age at least six months after pitching the yeast.
- Stabilise if necessary and back sweeten if desired.
- Bottle and wait for at least two years before having a little taste test.

I still have about 8gallons of frozen elderberries. I’m going to try this method on my next batch.I love this site.
LikeLike
Would love to hear how it turns out and any advice and tweaks.
LikeLike
Hi. Very interesting sequence here with your variations between 2016 and 2017. Now at two years out, how did your experiment pan out. Have you come closer to mastering elderberry wine?
Cheers,
Joshua Finsel
LikeLike
2017 are still in the bottles. Cracked open one recently to test and the tannin seemed softer though I plan to leave as long as possible. The most recent version went off piste as a total test with loads more fruit. This year I will be back to this recipe but with some acid management and a plan to age for at least 4 years.
LikeLike
Hello Luke,
Many thanks for sharing your recipes and experiences. I’m particularly interested in a dry style elderberry wine, so this recipe has caught my eye. I have a question about sugars though – do you use a particular kind given that you don’t first melt it? I’m worried about not being able to dissolve the sugar by stirring it.
Kind regards
Mikael
LikeLike
It’s just regular table sugar stirred in with a metal ladel. I thoroughly was the ladel the pour a kettle of boiling water over it to sterilise it. The sugar dissolves easily and even if there was some left the fermentation will agitate it and dissolve it. Love hear any iseas you use and see your wine.
LikeLike
Good to know – many thanks Luke. I’ll let you know how I get on.
Kind regards
Mikael
LikeLike
This is wonderful! How would you prep elderberries for reuse if mixed in with lees?
LikeLike
Put new ingredients on top. The yeast will be plentiful and happy.
LikeLike
Amazing site. I am hooked!
Last year I made elderberry wine without cold-soaking due to no fridge space. This year I realised I don’t need it.
I am cold soaking in a 20 liter Cornelius keg I have for dispensing beer. This enabled me to add more water for soaking. I purged the oxygen from the remaining headspace with CO2 so there will be no spoilage. The keg can then be placed in a shed/garden/attic, etc.
LikeLike
Impressive use of the corny keg!
LikeLike
Why not just crush and juice the berries right away instead of cold soak if tannins are too much?
LikeLike
Because seeds have stronger tannins.
LikeLike